Title Sequence Tools: Resolve vs After Effects vs Jitter
Quick verdict: which tool fits which title sequence · What a title sequence is, and what it is not · The four tools and where each stands in November 2026 · Specs side by side: 12 rows that matter for a title sequence · Pricing and plan limits compared · Vendor benchmarks: what each source actually measures · Motion control, type and readability · AI features in each tool, and what they do to a title sequence · Frame by frame: build a title sequence, then set the render · Real-world scenarios and use-case recommendations · Migration guide: moving a title sequence between tools · Pros and cons of each tool for title sequences · Verdict: start with Resolve, move to After Effects for depth · Before you render
For a title sequence you can finish this week, DaVinci Resolve is the best free place to start, After Effects is the pick for layered motion, Jitter is the quickest route from idea to a clip you can drop into an edit, and Kapwing is the easiest for a shared browser project. The free edition of Resolve limits output to Ultra HD or lower and one GPU on Windows and Linux, according to Blackmagic’s own release notes. That cap sits far above what a YouTube opening needs.
A title sequence is the opening run of names, titles and graphics that sets the tone of a video, a series or a short film. It runs longer and is more designed than a single card. It has a rhythm, a type system and usually a sound cue. This comparison covers the four tools creators most often reach for when they want to build one: DaVinci Resolve 21, Adobe After Effects 27.0, Jitter and Kapwing.
If you only need one static card with a name on it, start with our title card maker comparison instead. This piece is about sequences: several beats, motion between them, and a render you can reuse across episodes. Every spec below comes from the vendors’ own pages and release notes, checked on November 22, 2026. Where only one page reported a figure, the text says so.
Quick verdict: which tool fits which title sequence
Pick by the shape of the sequence, not by the brand. A sequence with many layers, 3D type or tracked footage belongs in After Effects. A sequence that lives inside an edit you are already cutting, with color and audio on the same timeline, belongs in Resolve. A sequence built from type, shapes and simple transitions that must match your edit’s frame rate belongs in Jitter. A sequence made by two or three people in a browser, with captions and AI clips around it, belongs in Kapwing.
Here is the short version of the ranking by situation. Each line is expanded later with the specs behind it.
- Lowest cost to a finished render: DaVinci Resolve, because the free edition shares Studio’s core processing and exports up to Ultra HD.
- Deepest control over motion and 3D: After Effects 27.0, which added layer-based materials for the Advanced 3D renderer in the November 2026 release.
- Fastest to a match with your edit: Jitter, which exports at 23.976, 24 and 29.97 fps so the clip drops into a timeline without retiming.
- Best for a team that edits in a browser: Kapwing, with a free plan that exports up to 4 minutes and paid plans priced per member.
None of these tools is a template store. You still design the sequence. What changes between them is how much control you get, how much the software does for you, and what the export looks like when you hand it to the rest of your pipeline. The sections below walk through each of those differences in order.
One caveat on prices and versions. Software vendors change both often, and Adobe is running Black Friday offers on Creative Cloud Pro that end on November 27, according to its own pages. Treat every figure here as a snapshot and confirm it on the vendor’s pricing page before you subscribe or buy. The reader who pays attention to dates saves money, because promotions come and go within days.
What a title sequence is, and what it is not
A title sequence runs from a few seconds to a minute or more and introduces the work. In film and TV it carries credits and sets mood. On YouTube it usually carries a channel name, an episode title and a short logo sting. The craft is the same in both places. You decide what appears, in what order, how long each element holds, and how it leaves the frame.
It differs from three things people confuse it with. A lower third is a name bar that sits over footage and leaves quickly. A title card is one still or lightly animated frame. A logo sting is a short animation of a mark. A sequence often contains all three. If your real need is the logo piece, the logo animation comparison of After Effects 27.0, Rive and Lottie covers that narrower job with export formats.
The reason the distinction matters for tool choice is timing control. A single card needs a text box and one animation preset. A sequence needs a timeline where several elements overlap, ease in and out, and land on audio beats. That pushes you toward tools with a real timeline and per-property keyframes. All four tools here have one, but they differ in how deep it goes.
Most openings fall into one of three families. The type-only opening carries the whole job with typography and motion, and it is the cheapest to build. The logo-led opening resolves into a mark and borrows the logo’s colors and shapes. The footage-led opening cuts moving pictures under or between the titles, which means the sequence is really a small edit with type on top. Knowing which family you are building tells you which tool to open. Type-only fits Jitter and Kapwing well. Logo-led fits After Effects or Jitter. Footage-led fits Resolve, where the cut and the type share a timeline.
Think in three beats for every element: in, hold, out. Each needs an entrance, a stretch where it sits still long enough to read, and an exit. Most amateur sequences fail on the hold. The type arrives with flair, then leaves before a viewer finishes the second word. Whatever tool you choose, build the hold first and decorate the entrance after.
For the wider set of related guides on this site, the lower thirds and titles hub lists the card, caption and credit articles that sit around this one.
The four tools and where each stands in November 2026
All four products are actively developed as of November 22, 2026. The facts sheet we built from vendor pages found no rename, retirement or acquisition for any of them. Here is the current state of each, starting with the one most creators already have on their machine or can install for free.
DaVinci Resolve 21 and Studio
Blackmagic’s product page lists DaVinci Resolve 21 as the current release, with a free edition and a paid Studio edition. The vendor describes the free version as sharing the same core processing as Studio, with output limited to Ultra HD or lower and one processing GPU on Windows and Linux. A point release, 21.2, was reported in November 2026 with fixes for timecode, multicam and ACES 2.0 handling. The deeper breakdown of what the paid version adds is in our DaVinci Resolve free vs Studio piece.
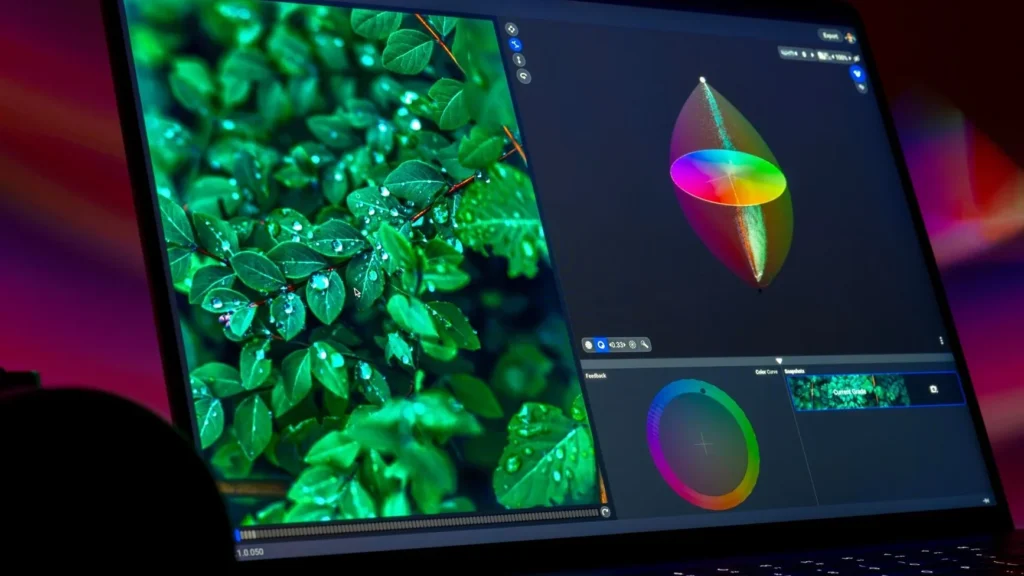
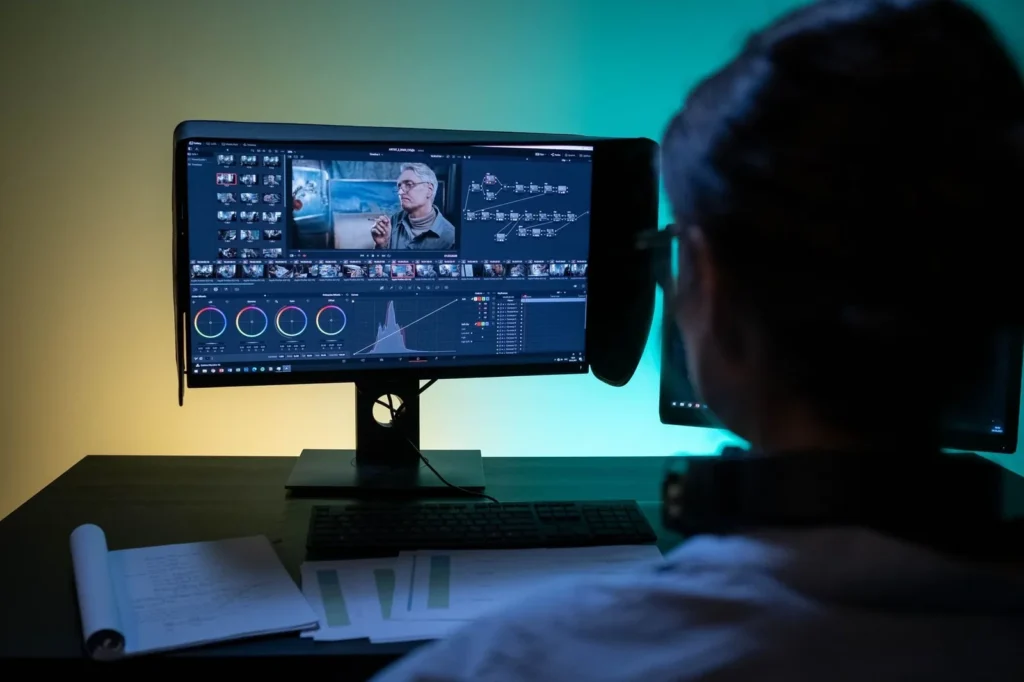
For title work, the relevant part is that Resolve positions itself as one application for editing, motion graphics, color and audio on Mac, Windows and Linux. You can build the sequence on the same timeline as the video it introduces. That removes the round trip between an editor and a motion app, which is where many creators lose an afternoon to export settings and re-imports.
Adobe After Effects 27.0
Adobe’s release notes call 27.0 the November 2026 release, and Adobe’s community material refers to it as After Effects 2027. It runs on Windows and macOS. New in this version, per Adobe’s notes, are an AI Assistant, layer-based materials for the Advanced 3D renderer, and Substance 3D Materials on 3D text and shape layers. Adobe also announced a Creative Agent for its flagship desktop apps on November 10, with After Effects on the list. The company’s Adobe MAX 2026 recap shows where the Creative Cloud line is heading.
After Effects is sold by subscription, and the cost question comes up often enough that we answered it separately in Is After Effects free for logo animation? The short version: Adobe sells it through Creative Cloud, and the real cost depends on the plan and the promotion running that week.
Jitter and Kapwing, the browser tools
Jitter is a web-based motion design tool. It ships dated feature releases rather than numbered versions. Its changelog shows Multi-brainstorm on October 28, and reportedly Brand Kits in beta on November 10 and a Counter template collection on November 17. Kapwing is a browser video editor that has moved toward AI generation and an editing agent it calls Kai. Its free plan exports videos up to 4 minutes long. Neither tool offers the layered compositing of After Effects, and neither claims to.
Specs side by side: 12 rows that matter for a title sequence
The table below sticks to what the vendors’ own pages state. Where our checked pages were silent, the cell says so instead of guessing. That is deliberate. A blank is more useful to you than an invented number.
| Spec | DaVinci Resolve 21 | After Effects 27.0 | Jitter | Kapwing |
|---|---|---|---|---|
| Runs in | Desktop app | Desktop app | Browser | Browser |
| Platforms | Mac, Windows, Linux | Windows, macOS | Web | Web |
| Version scheme | Numbered (21, then point releases) | Numbered (27.0, November 2026 release) | Dated feature releases | Dated release notes |
| Motion engine | Fusion, built into the app | Layer-based compositing with keyframes | Timeline with presets and custom animations | Editor timeline with animations |
| 3D type | Through Fusion (not checked in detail) | Advanced 3D renderer with layer-based materials | Not a stated focus | Not a stated focus |
| AI help | AI-assisted tools, covered below | AI Assistant (new in 27.0) | Jitter AI with Balanced and Smart modes | Credit-based AI tools |
| Free tier | Yes, free edition | No free edition, subscription sold | See Jitter’s pricing page | Yes, Free plan |
| Free output cap | Ultra HD or lower | Not applicable | Check current plan page | Exports up to 4 minutes |
| Frame rates documented | Set per project | Set per composition | 23.976, 24, 29.97 fps export | Not stated on checked pages |
| Still export | Not checked on our sheet | Not checked on our sheet | PNG at 1x, 2x, 3x | Not checked on our sheet |
| Audio on the same timeline | Yes, audio post-production is built in | Audio layers inside a comp | Not a stated focus | Yes, it is a video editor |
| Team use | Multi-user projects | Teams plan through Creative Cloud | Workspaces | Per-member plans |
Three rows deserve a closer look. Frame rate export matters because a sequence at the wrong rate stutters against your footage. Jitter’s own help text says the 23.976, 24 and 29.97 fps options let animations drop into video edits without stutter or dropped frames. Audio on the timeline matters because titles usually land on a sound cue, and only Resolve and Kapwing give you that in the same window. 3D type matters if your style leans on depth, where After Effects 27.0 is the clear leader on documented features.
Resolve’s Studio edition adds items such as the Neural Engine, Magic Mask and 10-bit video up to 120 fps, according to Blackmagic’s product page as read through our research. For a title sequence the free edition is enough in nearly every case. Studio matters when you need resolutions beyond 4K or its noise reduction on plate footage behind the type.
The gaps in the table also tell a story. Two of the four vendors say little on their checked pages about still export, and one says little about frame rates. If a feature is critical to your pipeline, such as an alpha channel for overlay use, test it in the free tier before you plan around it. A ten-minute test costs nothing and avoids a surprise on delivery day.
Pricing and plan limits compared
The table shows how each product charges and what the free route gives you. Exact dollar figures follow in the text with their sources named, because several of them came from a single page and may have changed.
| Tool | How you pay | Free route | Limit on the free route | Best fit for budget |
|---|---|---|---|---|
| DaVinci Resolve 21 | Free edition | Yes | Output Ultra HD or lower, one GPU on Windows and Linux | Anyone who wants a $0 start with a full timeline |
| DaVinci Resolve Studio 21 | Paid Studio edition | Free edition covers most title work | Not applicable | Needs resolutions beyond 4K or Studio-only effects |
| After Effects 27.0 | Creative Cloud subscription | No free edition | Not applicable | Teams already paying for Creative Cloud |
| Jitter | Subscription tiers | Check Jitter’s pricing page | Not verified on our sheet | Designers who want fast motion without a desktop app |
| Kapwing | Per-member subscription, credits for AI | Free plan | Exports up to 4 minutes, 50 AI credits for free users as of August 2026 | Small teams sharing a browser project |
Now the numbers, with their sources. Blackmagic lists DaVinci Resolve Studio at US$295, and reportedly ran a 20% promotion from October 20 to November 20 that cut it to US$236. The promotion has ended, so US$295 is the figure to plan around. After Effects is sold only through an Adobe Creative Cloud subscription, either on its own or inside the Creative Cloud Pro bundle, so check Adobe’s current pricing page before you budget. Adobe’s own pages also show regional prices that differ from the US ones, so any figure you see may not carry over to other countries.
Kapwing’s plan FAQ listed Pro at US$16 per member per month billed annually and US$24 billed monthly. Business was US$50 billed annually and US$64 billed monthly. Pro carried 1,000 credits a month and Business 4,000. Kapwing also says it does not offer free trials for Pro or Business. Those figures were still shown in material updated in late October 2026, but confirm them before buying.
Jitter publishes tiers that include Pro and, since a June 30 announcement, an Ultra tier described as having six times the AI credits of Pro. Jitter also cut the credit cost of AI generations by 50% on August 4, according to its changelog. Those are reported by a single source each, so check the pricing page for the amounts that apply today.
For a one-off cost comparison with another editor, our DaVinci Resolve vs Premiere Pro article lays out the same Studio price against Adobe’s plan structure. The main lesson carries over here. A one-time purchase beats a subscription if you make sequences for years. A subscription beats it if you need a tool for one project.
Vendor benchmarks: what each source actually measures
Independent benchmark data for title sequence software is thin. Published render-time tests tend to cover whole-timeline exports, not a 15-second motion piece, and none that passed our source check applied to the current versions. So this section reports what four vendor sources publish about limits and capabilities. It does not invent render times.
| Source | What it publishes | Why it matters for titles |
|---|---|---|
| Blackmagic release notes | Free edition output limited to Ultra HD or lower, single GPU on Windows and Linux, same core processing as Studio | Sets the ceiling for a free title render |
| Adobe After Effects release notes | 27.0 adds AI Assistant, layer-based 3D materials, Substance 3D Materials on text and shapes | Defines what is new for 3D and generated elements |
| Jitter changelog | 23.976, 24, 29.97 fps export, PNG at 1x to 3x, faster rendering for layered effects | Controls how the clip matches your edit |
| Kapwing release notes, August 2026 | Free export length raised from 1 minute to 4 minutes, 50 AI credits for free users | Controls whether a long sequence exports at all on the free plan |
Reading across those sources, three patterns show up. First, free-tier limits are about length and resolution, not feature locks. Kapwing moved from 1 to 4 minutes in August, which tells you free caps move. Second, speed claims come from vendors. Blackmagic reportedly said on October 20 that Resolve 21.1 runs Magic Mask tracking and Speed Warp substantially faster on NVIDIA RTX Spark systems. That is a marketing claim about two features that are not title tools anyway. Third, frame rate handling is where the browser tools finally match the desktop ones. Jitter’s added export rates close the gap that used to push people back to desktop software.
If you want to measure render speed for your own sequence, the method is simple. Export the same sequence from each tool at the same resolution and frame rate, note the wall-clock time, and repeat three times. Report the median. That gives you a number that matches your hardware, which no vendor chart can do. Also note the first-frame delay in browser tools, since a web editor may queue your export on a server instead of rendering on your own machine.
Motion control, type and readability
Control over motion is the real dividing line between these tools. After Effects gives you per-property keyframes, expressions and a graph editor for easing. Resolve’s Fusion uses a node graph, which suits compositing and tracked text but feels different to anyone raised on layers. Jitter uses a timeline with animation presets, custom animations and effects. Kapwing leans on prebuilt animations inside an editor.
For title work, easing matters more than most beginners expect. A name that snaps in at constant speed looks cheap. A name that decelerates into place looks deliberate. After Effects and Jitter both expose easing directly. Jitter’s Brand Kits, reportedly in beta since November 10, store colors, text styles and easings so the same feel carries across projects. That is a useful idea for a series, where every episode title should move the same way.
3D type is where After Effects 27.0 pulls ahead. Adobe says animated precomps, solids, images and video layers can now act as materials in the Advanced 3D workflow, and Substance 3D Materials work on 3D text and shape layers. In practice that means a title can carry a moving texture, such as a video loop mapped onto extruded letters. Resolve’s Fusion can build 3D scenes too, but the workflow is node-based and the learning curve is steeper for people new to compositing.
Templates also shape the choice. If you plan to start from a pre-made structure, look at what exists for each tool. Our After Effects templates article covers the library side, including what is free and what needs a subscription. Jitter publishes template collections of its own, such as the eight-template Counter set reported on November 17. Resolve and Kapwing have title presets built in, and Resolve lets you save and reuse your own.
Readability is the part no tool does for you. Keep the type system tight: two typefaces at most, one for display and one for supporting credits. Set a consistent safe margin so nothing sits at the screen edge, because TVs and some phone players crop. Check contrast against the busiest frame behind the text, not the calmest. Leave credit lines on screen long enough to read aloud once at a relaxed pace. If you cannot read it that way, a first-time viewer cannot either.
Mobile viewing changes the rules. On a phone, small credit text turns into noise. If most of your audience watches on a phone, size the series title and episode title for a thumb-sized screen and drop any line that only works at TV size. Browser tools show this problem quickly because their preview is often small, while desktop tools make it easy to forget by giving you a large monitor and a wide canvas.
AI features in each tool, and what they do to a title sequence
All four products now carry AI features, and they do different jobs. Treat them as helpers for the dull parts of the build, not as a replacement for the design.
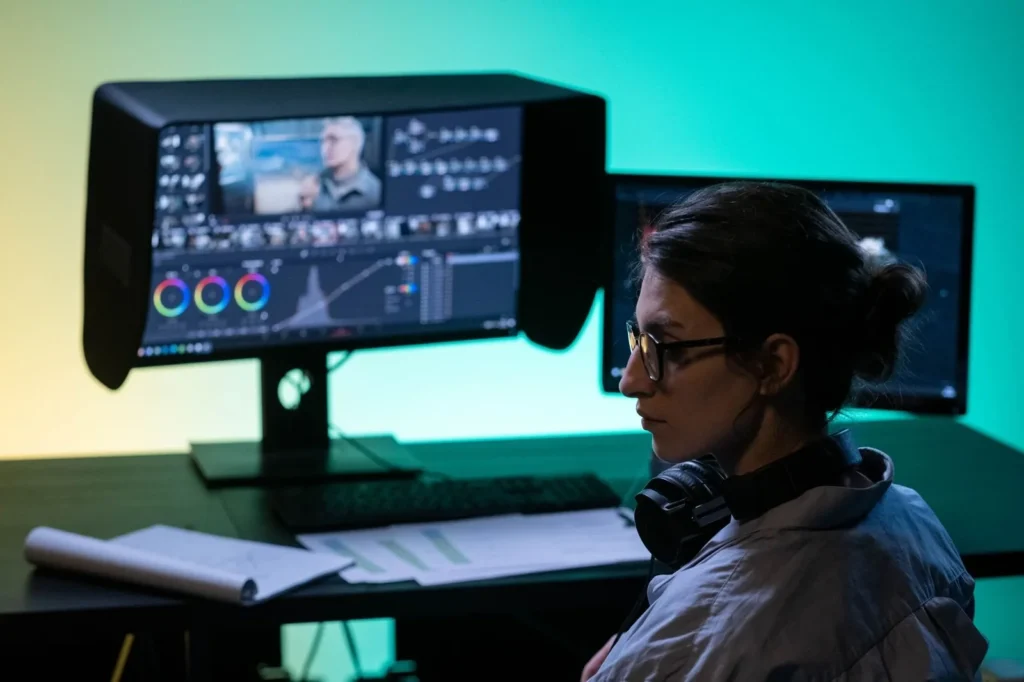
After Effects 27.0 introduces an AI Assistant that Adobe reportedly describes as able to organize projects, write and repair expressions, and generate images and video. For a title sequence the most useful piece is probably expression help. Many motion designers avoid expressions because the syntax is fussy. A tool that writes and fixes them lowers that barrier. Adobe also previewed local MCP integrations on November 17 that could let third-party agents change project files while keeping layers editable. That is a preview, not a shipped feature.
Jitter AI now runs in two modes. Balanced uses Claude Sonnet 5.5 and suits timing tweaks and text swaps. Smart uses Claude Opus 5.5 and handles multi-step requests, such as building a full animation sequence from a prompt. Jitter says Smart uses about twice as many credits as Balanced, and that generations on Opus 5.5 use around 25% fewer credits than before. For titles, the sensible habit is to draft the structure in Smart, then switch to Balanced for revisions.
Kapwing’s Kai agent works inside the Kapwing editor and, according to Kapwing, through Claude, ChatGPT, Codex or an MCP connection. Its pages also list newer generative video models, which is useful for generating a background plate behind your type. Credits govern AI use, so a long generation session can drain a monthly allowance quickly.
Resolve 21.1 added AI-assistant integration and more than 100 new tools and controls. The Studio edition’s Neural Engine features, such as Magic Mask and text-based editing, are paid. For title work, the free edition’s value is not AI. It is a proper timeline and Fusion.
Whichever you use, check the output rights of generated elements before you put them in a sequence you plan to reuse for years. Rules differ by vendor and by plan, and they change. The vendor’s terms page is the only reliable answer, and it is worth reading once before you build anything that carries your channel’s identity.
Frame by frame: build a title sequence, then set the render
The steps are the same in every tool. Only the buttons change. This build assumes a channel opening with a series title, an episode title and a short credit line. If you are new to Resolve’s interface, our walkthrough of editing a YouTube video in DaVinci Resolve 21.2 covers the basics around the Fusion page.
- Write the beat sheet first. List each element and what it says. Three to five beats are plenty for a channel opening.
- Set the project to match your edit. Same resolution and frame rate as the video it introduces.
- Build the hold frame. Place the final readable layout of each beat as a still. Check spacing, margins and contrast here, before any motion exists.
- Add the entrance. Animate each element into its hold position. Use easing so it decelerates into place.
- Add the exit. Mirror the entrance or use a different move, but keep exits quicker than entrances.
- Time to the sound. Drop a music or sound-effect cue under the sequence and nudge the beats to land on it. This is easiest in Resolve and Kapwing, which keep audio on the timeline.
- Check at full speed on the target screen. Play it on a phone and a TV if you can.
- Render a short test, then the master. Import the test into the real project before you render the full file.
A simple cue sheet keeps the timing honest. Use frames, not seconds, because frames are what you actually edit. Fill in the in, hold and out columns for each beat.
BEAT   TEXT              IN (frames)   HOLD (frames)   OUT (frames)
1      Series title      ___           ___             ___
2      Episode title     ___           ___             ___
3      Credit line       ___           ___             ___
SOUND  Cue on beat 1 at frame ___
Differences between tools show up at step 4. In After Effects you set keyframes on a layer’s position or opacity, then open the graph editor to shape the curve. In Resolve you move to the Fusion page, add a text tool and animate with keyframes in the inspector. In Jitter you add an animation preset to a layer or build a custom one on the timeline. In Kapwing you choose an animation from the editor’s panel and adjust its duration.
Jitter’s help article on first animations gives a plain example of the logic. To fade a layer in, you set an Opacity animation with an initial value of 0% and a “to” value of 100%. The same idea applies everywhere. Every motion is a start state, an end state and a curve between them.
Render settings
Export is where title sequences go wrong quietly. A mismatch in frame rate or length shows up as a hitch on the first day it plays against real footage. Set your render to match the project it will sit in, then check it there before you publish.
| Setting | What to choose | Why |
|---|---|---|
| Resolution | Match the edit, 1920×1080 or 3840×2160 | Resolve’s free edition caps output at Ultra HD, which covers both |
| Frame rate | Same as your edit (23.976, 24 or 29.97 are Jitter’s options) | Prevents stutter when the clip sits against footage |
| Length | Short enough that viewers do not skip it | Kapwing’s free export allows up to 4 minutes, far beyond a normal opening |
| Export format | A format your editor reads cleanly | Test a short clip in the receiving editor first |
| Stills | PNG for a poster frame or end card | Jitter exports PNG at 1x, 2x and 3x |
Format choice depends on the receiving editor, and the safest approach is a quick test. Render a three-second clip, import it into the final project and scrub through. If it plays and keys cleanly, render the full sequence. If you want to see how finished theme packs describe resolution, length and frame rate, the intro themes page shows one way to lay that information out.
Transparency deserves a note. If your sequence needs to sit over footage, such as an animated name bar, you need a format that carries an alpha channel. Which formats do so differs by tool and by plan, and our sheet did not verify alpha export for each one. Test it before you commit to a pipeline that depends on it.
Keep a master. Render the sequence once at the highest quality your tool allows, store it, and make smaller copies from that master for specific platforms. Re-rendering from the project every time invites accidental changes, and it breaks the moment a font or plugin goes missing.
Five mistakes recur in amateur sequences. The hold is too short. The type has too little contrast against a busy plate. The sequence runs longer than the story needs. The frame rate does not match the edit. The sound cue and the visual beat miss each other by a few frames. Each one is cheap to fix in the cue-sheet stage and expensive to fix after you render.
Real-world scenarios and use-case recommendations
These five scenarios are built from documented features, not case studies of named channels. Each ties a real feature to a title sequence job so you can see how the choice plays out.
Scenario 1, a countdown opening for a weekly show. You run a weekly series that opens on a milestone, such as an episode number or a running total. Jitter’s Counter collection, reported on November 17 with eight templates for milestones, statistics and countdowns, fits this directly. You pick a template, swap the numbers and export at the frame rate your edit uses.
Scenario 2, a branded series with the same feel every episode. You publish a series and want each episode’s title to move the same way. Jitter’s Brand Kits reportedly save colors, text styles and easings at the workspace level. Build the look once, then reuse it. In After Effects the equivalent is a master project with expressions, which takes more setup and gives you more control.
Scenario 3, a documentary-style opening over graded footage. Resolve keeps edit, color and Fusion in one application, so you can change the grade and watch the type respond without exporting. That shared timeline is the strongest argument for Resolve in this scenario.
Scenario 4, a 3D title with a moving texture. You want extruded letters that carry a moving texture, such as smoke or a looping video. After Effects 27.0’s layer-based materials, which let animated precomps and video layers act as materials, are made for exactly this. It is the one scenario here where the browser tools are not a realistic choice.
Scenario 5, a two-person team making a captioned opening in a browser. Two people on different continents need to edit the same project. Kapwing’s per-member plans and shared workspaces suit that, and its August 2026 release notes mention richer subtitle styles and animations. You trade depth of motion control for ease of collaboration.
A sixth case, a one-off sequence for a short film’s credits, usually favors Resolve for the same reason as scenario 3, plus the free price. The point across all of them is that the feature set, not the logo on the box, should drive the pick.
Recommendations by job
- First YouTube channel opening, no budget: DaVinci Resolve free edition. You get a timeline, Fusion and Ultra HD export at no cost, and one app covers the edit as well. Our CapCut vs DaVinci Resolve comparison shows how it stacks up against the other popular free editor.
- Series branding with strict consistency: Jitter with Brand Kits, or an After Effects master template if you need deeper control.
- 3D or texture-heavy titles: After Effects 27.0, because of its 3D material workflow.
- Titles over graded footage in one project: Resolve, so color and type live in the same application.
- Remote team with shared access: Kapwing, billed per member.
- Mac-only editors weighing options: read Final Cut Pro vs DaVinci Resolve first, since a native Apple editor changes the math.
- Quick milestone or counter openings: Jitter’s Counter templates.
From the Vipid archive
For a reference on a smoke-style opening, the Epic Titles smoke title sequence theme shows one finished example of the kind of opening this article discusses.
One more rule of thumb. If you will touch the sequence once a year, favor the tool you already pay for. If you will rebuild it for every episode, favor the tool with the best template and reuse system. Switching costs are real, and the migration section below shows how large they are.
Migration guide: moving a title sequence between tools
No tool here opens another’s project file, so migration means rebuilding the sequence, not converting it. The good news is that a well-documented sequence rebuilds quickly. The work is in the notes, not the files.
Start by exporting a reference render from the old tool. This is your target. Then gather the assets: fonts, logo files in vector form, audio cues and any plate footage. Note every timing value from the old project, in frames. The cue sheet from the build section is the document you rebuild from.
- After Effects to Resolve: export the reference render, rebuild type and shapes on the Fusion page, and match easing by eye against the reference. Expect to lose expression-driven behavior and rebuild it with keyframes. For the cost side of leaving Adobe, see our piece on After Effects alternatives for logo animation.
- Resolve to After Effects: export a plate-free version if your format allows, import it as a layer, and rebuild in layers whatever you want to extend.
- A desktop tool to Jitter: recreate the type with the same fonts, apply animation presets, then export at your edit’s frame rate. Complex compositing will not carry over.
- Jitter to a desktop tool: export the clip and use it as a layer, or rebuild if you need to change the animation itself.
- Between browser tools: export the reference and rebuild from the beat sheet. Check the new tool’s free export length and watermark rules first.
Budget time honestly. A three-beat sequence rebuilds in a short working session if your notes are good, and takes much longer if you have to reverse-engineer timing from a render. The single best migration habit is to save the cue sheet and the font files in the same folder as the master render, every time you finish a sequence.
Check fonts first, because they cause most failed migrations. A typeface licensed for one app may not be licensed for another, and web tools often ship a limited font list. Confirm the font license covers video before you commit, and keep a fallback typeface chosen in advance so the layout survives a swap.
Pros and cons of each tool for title sequences
| Tool | Pros | Cons |
|---|---|---|
| DaVinci Resolve 21 | Free edition, editing, motion graphics, color and audio in one app, output up to Ultra HD | Node-based Fusion has a steeper learning curve, free edition limits output to Ultra HD and one GPU on Windows and Linux |
| After Effects 27.0 | Deepest motion control, new 3D materials, AI Assistant | Subscription only, regional prices vary, heavier to learn |
| Jitter | Fast, frame rate options that match an edit, template collections, AI modes | Browser-only, limited compositing, little audio focus |
| Kapwing | Browser collaboration, free plan, AI generation tools | Credit-based AI, per-member pricing, less depth in motion control |
Read the cons as risks to plan around. Resolve’s learning curve costs time, not money. After Effects costs both. Jitter and Kapwing save time at the price of depth. If your sequence is simple, depth is wasted and the faster tool wins. If your sequence is ambitious, depth is the whole point.
Also think about lock-in. A sequence stored as a Resolve project is tied to Resolve. A sequence stored as a master render is portable, but you cannot edit the animation inside it. The safest routine is to keep both: the project for edits and the render for everyday use.
Verdict: start with Resolve, move to After Effects for depth
For most creators building a title sequence in November 2026, start with DaVinci Resolve. It costs nothing, caps output at Ultra HD (more than nearly every opening needs), and puts the sequence in the same application as the edit. The data points that settle it are the free edition’s shared core processing with Studio and the Ultra HD output ceiling, both stated in Blackmagic’s own notes.
Move to After Effects 27.0 when the design demands it. Layered compositing, 3D materials and expression control are the reasons, and they are good ones. Adobe’s subscription is a real cost, so make the move for a concrete need, not out of habit. Use Jitter when you want a fast, frame-rate-matched clip or a repeatable look. Use Kapwing when collaboration in a browser matters more than motion depth.
Scored on what this article checked, Resolve wins on cost and integration, After Effects wins on control, Jitter wins on speed to a match with your edit, and Kapwing wins on shared browser work. No tool wins everything. The best sequence is the one you finish, so pick the tool that gets you to a render this week and plan a second pass later.
Before you buy anything, build a three-beat test sequence in the free tier of two tools and compare the results on your own footage. An hour of testing beats a week of reading comparisons, including this one.
Before you render
Is DaVinci Resolve free enough for a title sequence? Yes for nearly all openings. The free edition shares Studio’s core processing and limits output to Ultra HD or lower, per Blackmagic’s notes. You only need Studio for resolutions beyond 4K or its paid effects.
What is the newest After Effects version? Adobe’s release notes name After Effects 27.0, the November 2026 release, as the latest version. Adobe’s community material also calls it After Effects 2027.
Can Jitter match my video’s frame rate? Jitter’s changelog lists export at 23.976, 24 and 29.97 fps. If your edit uses another rate, rebuild or convert in a desktop tool.
How long can a free Kapwing export be? Kapwing’s free plan exports videos up to 4 minutes long. Its August 2026 release notes show the cap rising from 1 minute to 4.
How long should a title sequence be? As short as the story allows. For a channel opening, a few beats with a clear hold on each are enough. A sequence viewers want to skip is too long, whatever the tool.
Do AI tools build a title sequence for me? They can draft one. Jitter AI’s Smart mode builds animations from prompts, and After Effects 27.0’s AI Assistant helps with expressions and generation. You still decide the beats, timing and type, and you should check output rights before reuse.
Should I render once or per platform? Render one high-quality master, then make platform copies from it. Test a short clip in the real project first so you catch frame rate and format problems early.
More from the Vipid blog
- Best Green Screen Software for Chroma Keying, Ranked
- YouTube Intro Template [2026]: 5 Tools, 3 Routes, $0 Start
- SVG Animator for Logos [2026]: 5 Tools, $0 Start
- Star Wars Intro Maker [2026]: 7 Tools, 720p Free Cap
- Logo Design upload a logo, get an animated logo intro
- Epic Smoky Titles your text in a smoke title sequence
- Star Text animated title theme
- All Vipid themes specs for every theme
Ines Calder
Ines Calder is the Titles & Motion Editor at Vipid, covering lower thirds, title sequences, kinetic typography and logo animation across After Effects, Premiere Pro, DaVinci Resolve and Final Cut Pro. She writes her guides in frames and safe areas so they hold up on a phone as well as a TV, and every template she lists carries its editor version, plugin needs and licence.